VR MEDIA VIEWERUSER'S GUIDE
[BACK TO PRODUCT]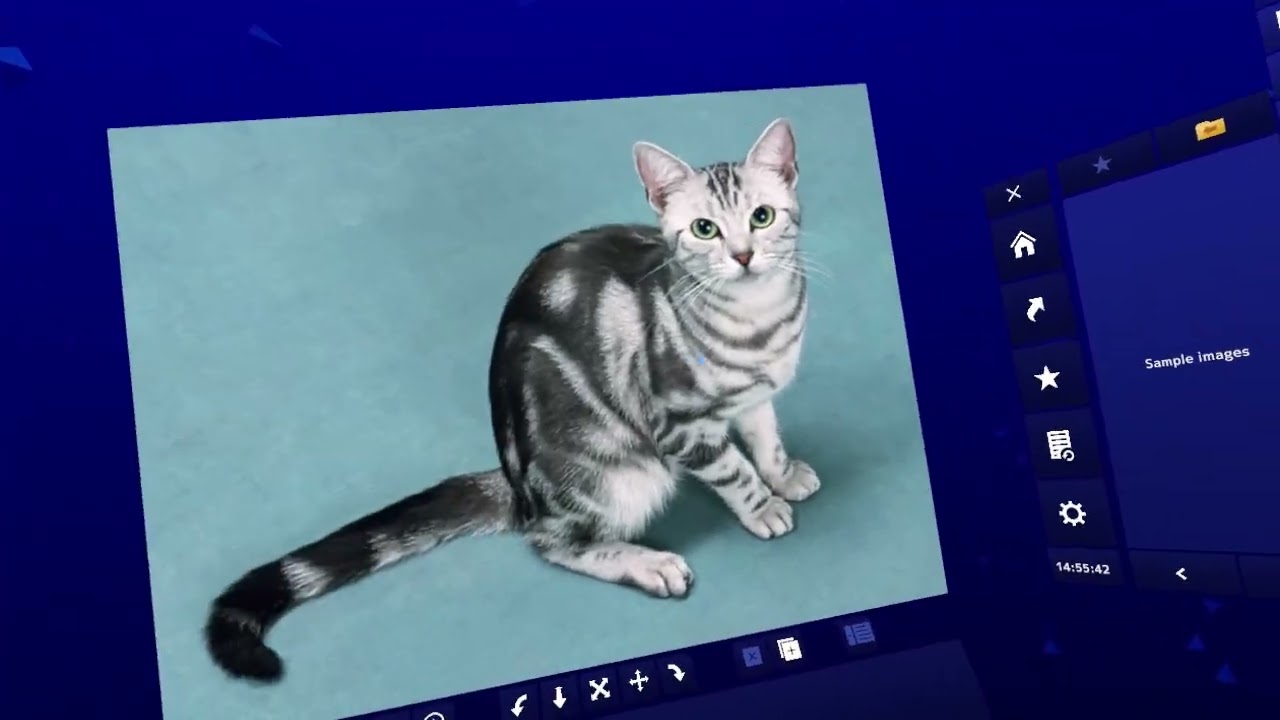
Please make sure to activate the OpenXR runtime before use
This application uses OpenXR to operate VR devices. Before use, please make sure to activate the OpenXR Runtime within your device management application, such as SteamVR (HTC VIVE, Valve Index, Pico, etc.), Meta Quest Link (Oculus Quest, Meta Quest), or OpenXR Tools for Windows Mixed Reality (WindowsMR). Examples of how to activate the OpenXR Runtime are provided below for the three applications mentioned above. For other devices, please refer to the device's manual, where you should find instructions related to OpenXR, and follow the guidance provided there.
SteamVR
[SteamVR] > [Click upper left] > [Settings] > [OpenXR] > [SET STEAMVR AS OPENXR RUNTIME]
Meta Quest Link
[Meta Quest Link] > [Settings] > [General] > [OpenXR Runtime] > [Set as active]
WindowsMR
[Launch "OpenXR Developer Tools for Windows Mixed Reality" from the official site] > [Mixed Reality] > [Installation status] > [Set as active runtime]
BASIC OPERATION
Pointer ON / OFF
Trackpad(or Thumbstick)center press.
While the pointer is displayed, the gaze pointer is enabled at the same time. The gaze pointer (blue dot) is a reference point that determines the direction for the pulling action described later.
Button click
Place the pointer on the button and press the Trigger.
You can also grab the file browser and media screen by pressing the Pointer + Trigger where it is not a button.
Pulling (Pulling action)
Place the pointer on the file browser or media screen. You can then pull those objects by pressing the Grip and moving the controller back and forth. The direction of the gaze pointer is the reference when pulling.
Sliding (Sliding action)
Place the pointer on the file browser or media screen. And pressing the Grip + Trigger, you can move those objects up, down, left and right.
Aligning
By pressing the Menu button (VIVE Wand), A or X (Other), you can align the displayed file browser and media screen in front of you.
Scrolling
Use the trackpad (or stick) to scroll through the file list and setting screen.
FILE BROWSER
The file browser is the window that appears on the right side when you start the application.
Home
The home displays 3 links from shortcuts, favorites, and history, which is convenient for quick access.
Shortcuts
The shortcuts are pre-registered with folders used mainly by Windows OS. If you are using them for the first time, please search for the target file here. Editing such as changing the display order and displaying on the home can be performed.
Favorites
For favorites, you can register a folder by clicking the star mark displayed in the upper left of the folder display. Editing such as changing the display order, displaying to home, and deleting can be performed.
History
In the history, the folder displayed in the past is automatically registered, so it is convenient when you want to access the folder you opened before. You can also remove it.
Settings
In the settings, you can make detailed settings for using the application.
“Headset monitor resolution” is an item that adjusts the sharpness of the field of view, so it is recommended to set it about 1.2~1.4. (If it is too high, the frame rate may be reduced)
“Background light effect” and “Background particle effect” do not directly affect the use of the application, so please turn them off if the PC specifications are not enough.
The gaze pointer (blue dot) is the reference point that determines the direction of the pulling action. You can make the pulling action more intuitive by adjusting the eye pointer to your preferred position. When the "Display gaze pointer" is turned off, the blue dot disappears, but it continues to exist as a reference point.
Changing the display type of file list
You can switch the display type of file list between detailed (file size and the date of the last update are displayed) and thumbnail (a reduced image is generated).
Sort type
You can switch the sort type by number, name, size, or update date time.
Include folder shortcuts in file list
When enabled, Windows folder shortcuts will be included in the file list.
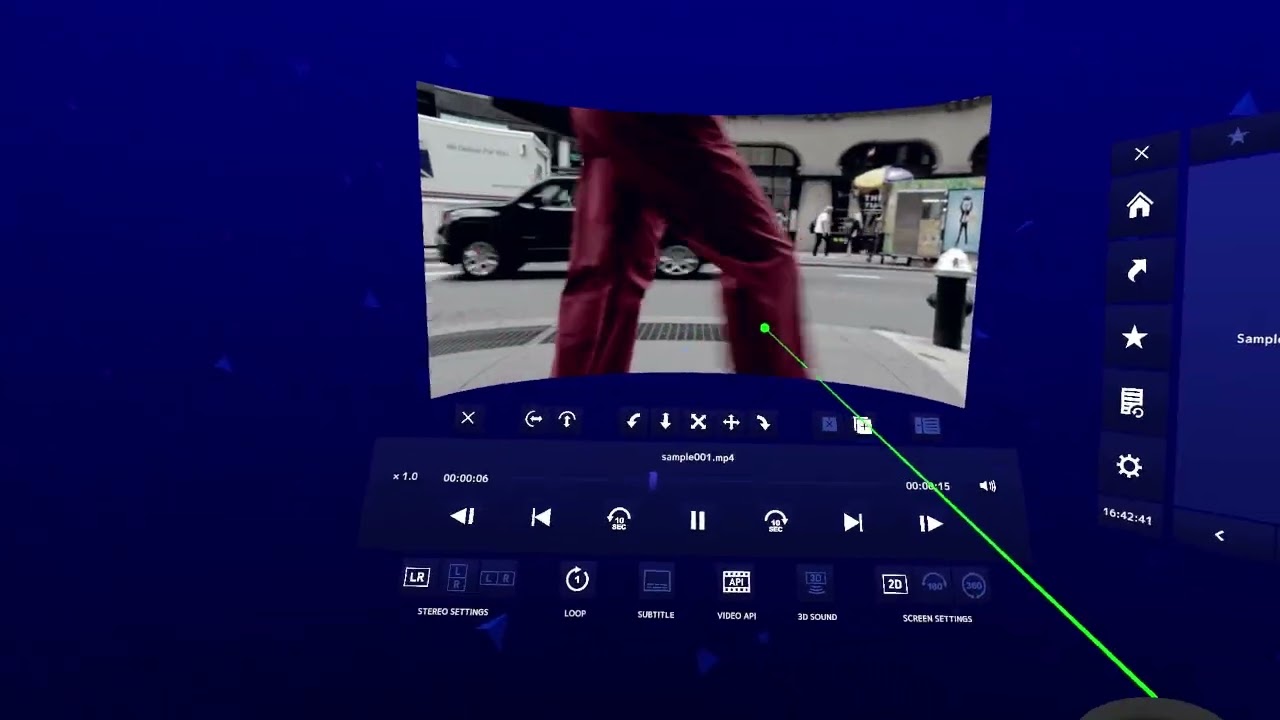
MEDIA SCREEN
The media screen is the window that appears when you click an image, sound, video, or other file on the file browser. The button group displayed below is the control panel.
Hide control panel
You can hide the control panel. If you want to redisplay, press the center of the Trackpad (or Thumbstick) and the control panel will be redisplayed at the same time when the pointer is redisplayed.
Curved screen (Vertical and horizontal)
Media screen can be curved by changing the value of the “Curved screen”.
90 °rotation
The media screen can be rotated in 90 °increments.
Aspect ratio
You can change the screen aspect ratio (width : height ratio).
Pulling (Pulling action)
You can pull the media screen by moving the controller back and forth.
The direction of the gaze pointer is the reference when pulling.
Resize
Drag the resize button and move the pointer to the left to reduce the media screen.
Move the pointer to the right to enlarge the media screen.
Sliding (Sliding action)
Can move up, down, left and right with respect to the media screen.
Swapping of left and right views
You can swap the field of view of the left and right eyes.
Parallax adjustment
You can adjust the distance of the image displayed on the left and right eyes.
Duplicate screen
You can duplicate screens up to 10 screens.
Close screen
You can close the duplicated screen.
Next file, Previous file
Go to the next (previous) file. If you want to match the display order to the file browser, first change the display order in the file browser, then click on the desired file, the display order on the media screen will be update. You can also move between files by focusing the gaze pointer on each button on both sides of the 2D screen.
Stereoscopic settings
By switching this mode according to the shape of the media (side-by-side or top-and-bottom), stereoscopic display is possible.
Screen settings
Switch this mode according to the media shape (2D, 180 degree, or 360 degree medias).
Projection
You can switch between projections (equirectangular or fisheye) when using a 180 degree screen. (360 degree screen are only compatible with equirectangular)
Slide show
Loop the files in the same layer at the specified time (sec).
Setting it to 0 (sec) disables the slide show.
Slide show (Shuffle)
Randomize the order of files in the same directory.
Moire reduction (only when image file is displayed, except MPO and GIF)
When screen tones used in comics are displayed in VR, moire (flickering) may occur.
However, you can reduce moire by enabling "Moire reduction".
Play/Stop animated images (GIF/WEBP)
You can play/stop the animation while displaying the animation image file.
Playback speed (only while displaying movie)
You can change the movie playback speed between x0.1 and x3.0.
Frame skip (only while displaying movie)
You can advance or rewind the movie frame by frame.
10sec skip (only while displaying movie)
You can advance or rewind the movie in 10 second increments.
Loop (only while displaying movie)
You can switch between looping the same file, looping within a folder, and not looping.
Range specification loop (only while displaying movie)
By specifying the start position and end position, loop playback within that range. In addition, the minimum time of the loop range is 1 second. (Depending on the specifications of your PC and the bit rate of the video, it may not loop smoothly)
Enable subtitle (only while displaying movie)
To apply a subtitle file (.srt) to the currently displayed video file, click the subtitle file (.srt) on the file browser. Click the “Enable subtitle file” button to show / hide subtitles.
Change video API (only while displaying movie)
If a particular movie file doesn't play, try changing the video API.
- MediaFoundation: A low-load video API that comes standard with Windows 10.
- DirectShow: MediaFoundation's predecessor video API (3D sound is not supported),
DirectShow supports third-party decoders such as LAV Filters (requires separate installation) - LAV Filters : https://github.com/Nevcairiel/LAVFilters/releases
- LibVLC: Extremely flexible video API using VLC library
Due to the relatively high-load, the frame rate may decrease depending on the environment.
3D Sound (only when displaying video with MediaFoundation, and 2D screen)
the audio is play from the direction of the screen
(the audio will be muted for a few seconds at the start of play)
AI Tools
This is an experimental image processing feature using AI inference (limited to 2D images). AI inference requires significant memory and computational power. It primarily attempts to process using the GPU, but if the GPU is not supported, it will fallback to CPU processing, which is expected to take a considerable amount of time. If you wish to use the AI tools, please turn ON "Enable AI tool" in "Settings".
- Depth Inference: AI infers the scene depth from the original image and generates a side-by-side stereoscopic image based on this data. It primarily attempts to process using the GPU, but if you are using an unsupported GPU, it will process using the CPU, which may result in significant processing time.
- Upscaler: Increases the resolution of small images (recommended within 512x512) using AI. This model is designed specifically for upscaling small images (4x). If you convert an image that already has a high resolution, the quality may degrade and processing will take a considerable amount of time. It primarily attempts to process using the GPU, but if you are using an unsupported GPU, it will process using the CPU, which may result in significant processing time. Text distortion within images is a known specification of the AI model.
SUPPORTED MEDIA FORMATS
- 【 Image 】 JPG, PNG, BMP, GIF (*1), WEBP (*1), MPO (*2), VRJPG (*3)
- 【 Movie (*4) 】 MP4, MOV, AVI, MKV, WEBM, ASF, WMV, M4V, TS, M2TS, MTS, VOB, 3GP, OGV, DIVX
- 【 Sound 】 MP3, WAV, AAC, FLAC, AC3, WMA, M4A, OGG, AIFF, OPUS
- 【 Subtitle 】 SRT (Only when using MediaFoundation and DirectShow)
- 【 Stereoscopic 】 Side-by-side, Top-and-bottom (Equirectangular)
*1 : Supports animation
*2 : Stereoscopic photo format
*3 : Google VR180 format
*4 : Even if the extension of the video file format is the same, there are many cases where it can be played or cannot be played depending on the conversion method. We are paying close attention to the latest video playback technology so that we can play as many videos as possible, but there are unsupported files such as new formats born in real time and videos with very large file sizes. I would appreciate your understanding. In addition, the subtitle data stored in the file is not supported. Please use the SRT file to display the subtitles.
Useful tips to know
When you want to access a network drive (NAS) connected to the network
A network drive (NAS) is an external storage device (HDD etc.) that is directly connected to the router. It is very convenient because you can access and save images and videos from multiple PCs at the same time. If you want to access a network drive from VR MEDIA VIEWER, perform "Map Network Drive" and it will be displayed in "Shortcuts > Drive". The method of assigning network drives may vary depending on the OS used and the manufacturer of the device, so please read the instruction manual or refer to the following reference site.
Map network drive (Microsoft official website):
https://support.microsoft.com/en-us/help/4026635/windows-map-a-network-drive